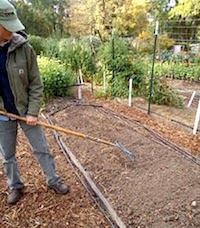
Tuesday, December 31, 2013

December Recipe: Lindsay's Wicked Good Thai Peanut Sauce

Organic Heirloom Cilantro
Add at the end to any kind of stirfry, steamed veggies or rice or put on chicken or fish – or just about anything! I've also used it as a salad dressing with delicious results.

Warning: this is very addictive stuff!

Ingredients:
3-5 large cloves garlic
large bunch cilantro
1 1/2 oz chopped ginger
1 tbsp peanut oil
1 tbsp dark sesame oil
1 tbsp hot chili oil or use Sriracha sauce
1/2 cup peanut butter
1/4 cup soy sauce (or to taste)
3 tbsp honey
3 tbsp rice vinegar
hot water as necessary


Blend all of the ingredients – that’s all there is to do!

For more great garden-inspired recipes, see Renee's cookbooks.

Recipes for Gardeners Who Cook


Wednesday, December 4, 2013

Sowing Cover Crop Mix


Cover crops are a beneficial and often necessary part of the seasonal garden to both protect and enhance garden soil. Cover cropping solves the problem of leaving garden soil bare during the winter when wind and rain and frost heaving erode top soil and leach out nutrients. The use of cover crops creates garden soil that is fertile with the best structure to grow healthy plants.

Our Cover Crop Mix is a blend of several legumes, grasses, roots, and rapeseed.
Components:  (Left to Right) Austrian Winter Peas, Daikon Radish, Winter Rye, Purple Top Turnip, Rapeseed Mustard, Hairy Vetch

The legumes, Austrian Winter Peas and Hairy Vetch, fix nitrogen from air into their root nodules. Winter Rye Grass has thick roots which hold the soil to prevent erosion and takes up excess nutrients in the soil. Purple Top Turnips and Daikon Radish have long tap roots which loosen dense soil and gather deep nutrients and minerals. Rapeseed takes up large amounts of nutrients that would otherwise be leached by the winter rains.

When these cover crop plants are incorporated back into the soil in the spring, they break down releasing the nutrients and minerals back into the soil and add plenty of organic matter which improves the soil structure.


Sowing Your Cover Crop


1. Prepare the bed
Prepare your planting bed: Remove all crop residue and break up any large clumps in the garden bed. Rake soil over evenly.


2. Prepare the seeds
Before opening the canister, shake it thoroughly to evenly mix the seeds with the rice hulls. Then open up the can, peel back the aluminum seal and pour some of the mixture into your hand.


3. Sow the seeds
Scatter the seeds carefully, giving them enough space so that they do not germinate in crowded clumps which will only stunt the growth of the plants. The rice hulls are easy to see and a good indicator of how far apart the seed has been sown.


4. Rake the bed
After scattering the seed, use a rigid rake to work the seeds down into the soil to a depth of 1/4 inch.


5. Water thoroughly
Water the seeds in thoroughly and evenly with a fine mist sprayer.


6. Success
A big bed of cover crop fully grown out.


Incorporating Your Cover Crop Into The Soil


Method 1: This method works best when the cover crop will be growing for a short time. When 5-6 inches tall, use a garden fork, shovel, weed wacker or rototiller to turn the cover crop into the ground to break down and enrich soil for planting. The breakdown process takes about a month.


Method 2: When cover crop is 1 foot tall, pull out the plants, shake off soil and then compost the plant material to incorporate into the soil later, when it has turned into rich, finished compost. Timing depends on how long your composting process takes. This method works well if it is planted in small areas.


Method 3: When the cover crop reaches 1 to 1 ½ feet tall, weed whack to chop it down. Cover the chopped material with black plastic to hasten decomposition, then turn the nutritious residue into the soil 2 or 3 weeks before sowing your garden crops.


Tuesday, November 12, 2013

Vegetable Markets Across the World


by Mila van de Sande
Assistant Trial Gardener


I am the Assistant Trial Gardener at the Renee’s Garden California Trial Gardens, where I work ten months of each year, taking a two month break each winter when it is miserably cold and wet here and the trial gardens need less attention. I take advantage of my time off to travel to faraway warm places. (I inherited the travel bug from my parents and my grandparents.)

In the last few years, I’ve spent my garden break time traveling to Mexico, South Africa, and India. Everywhere my travels take me, I love finding local farmers markets to see what they have to offer and how they display their goods. It is especially fun to see what unusual fruits and vegetables are available and sample them too.

          Boarding the train in India                         Zapotec Ruins in Oaxaca

I spent a month in Oaxaca, Mexico in 2008 taking language classes and we made a point of exploring the different markets. The markets I went to were very extensive and sold a bit of everything you might need from all kinds of food, including live turkeys, to fabric and household items like mops. There were rows and rows of fruits and vegetables, including big sacks of dried chilies, dried hibiscus, and a beautiful array of many dried bean varieties, one of my favorites.

There were pails with towers of oranges and bundles of onions with their greens still attached. One market I also went to was a small all Organic market with fruit, vegetable, and prepared food stands. This was not an abundant market, but it was good to see an Organic option. We had a lot of fun exploring all these colorful markets.

     Oaxaca: Dried chiles and hibiscus                         Dried beans

My next trip was to Chiapas, Mexico. One of the farmers markets I went to there was in the  town square of a small village outside of the city, with many vendors offering towers of colorful fruits and vegetables. Other vendors were selling their wares simply spread out on clothes on the ground.

One of the vegetables there that I was less familiar with was chayotes. They are related to squash and grow on a large vining plant. The big pear-shaped fruits are used like summer squash. We also visited a smaller Organic market in the city, which was teaming with beautiful vegetables, edible flowers, prepared food, baked goods, and honey.

   Chiapas: Edible flowers & vegetables              Chayotes and zucchini

My next year’s adventure took me to South Africa. In preparation for a week-long self-guided safari in northeastern South Africa with my mother, we went to a farmers market in Johannesburg to stock up on veggies. The market consisted of fruit and vegetable stands, prepared food, vegetable starts, and a wide range of crafts; one vendor was selling heirloom seeds along with vegetable starts.

One thing that stood out to me were the big beautiful pumpkins of various shapes and sizes. These are among my favorites, so we bought a yummy big blue one that we ate and enjoyed all week long.

         Johannesburg: Veggie starts                              Vegetable stand

In 2011, along with my friends Trial Garden Manager Lindsay and Josie, I went to India for my winter getaway. My experience of markets in India was different. In Bangalore, a city in the south, stands were set up in the street between the lane of cars and the sidewalk. These stands held a plethora of interesting and beautiful fruits, vegetables, and herbs, many of which I had never seen before.

Lindsay, Mila and Josie in Rajasthan, India

There were bread fruits, curry leaves, bananas of different sizes, dragon fruits, and summer squashes of many different colors and textures, just to name a few. I got to try some of these unusual fruits and vegetables while staying at my friend’s parent’s house; some I loved and others I found more interesting than delicious.

Another kind of “market” in Bangalore were the fruit and vegetable vendors that travel the streets with carts selling their goods. They call out what they are selling and will come to your front door if you ask them over. These vendors were a wonderful feature of that city.
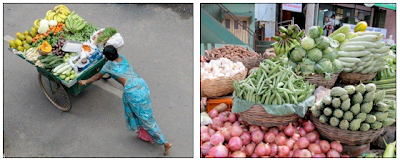
             India: Traveling vendor                                 Vegetable Stand

I have had great fun going visit markets in different parts of the world. Where will my next adventure take me? I am not sure, but I am hoping to do more traveling in South America, where I can continue to discover what their markets and culture have to offer.

Wednesday, November 6, 2013

October Recipe: Glazed Pumpkin Ginger Bars

Pumpkin, spices and candied ginger perfectly complement each other in these bar cookies. All our pumpkin varieties work well in this recipe. For more great recipes check out Renee's Cookbooks.

1 3/4 cup unbleached flour
1 tsp. baking powder
1/2 tsp. baking soda
1 tsp. cinnamon
1/2 tsp. ground ginger
1/2 tsp. nutmeg
1/2 tsp. allspice
1/2 tsp. salt
1/2 cup butter, room temperature
1 cup lightly packed dark brown sugar
1 egg
1 tsp. vanilla extract
1 cup cooked, pureed pumpkin
1/2 cup chopped walnuts or pecans
1/2 cup chopped candied ginger

Glaze:
1 cup sifted confectioners' sugar
2 tsp. grated orange zest
3 to 4 Tablespoons orange juice

Preheat  oven to 350 F. Grease a 10 x 15 in. baking pan. Sift together flour, baking powder, baking soda, salt, cinnamon, ground ginger, nutmeg and allspice.  Set aside.

In a large mixing bowl, beat butter until creamy then add brown sugar, beating until fluffy.  Add egg, vanilla and pumpkin, beating well. Add dry ingredients, mixing until batter is smooth. Stir in nuts and candied ginger. Spoon batter into prepared pan. Bake for 15 to 18 minutes or until bars pull away from sides of pan.

Combine confectioners' sugar with orange zest. Add orange juice gradually, adding just enough to give the proper consistency for spreading.  Spread on warm bars.  When cool, cut into diamonds or squares and store covered for a day to let flavors blend before serving. 

Makes 4 dozen

Recipes for Gardeners Who Cook

Thursday, October 10, 2013

Growing Great Garlic #1: Planting

by Renee Shepherd and Lindsay Del Carlo

Garlic is both easy to grow and takes up so little space that just about every gardener, even those with very limited space, can raise enough to be happily self-sufficient in this important and healthy cooking essential. Check out the especially flavorful garlic varieties available on our website.

We will be documenting of the whole process of planting, growing and harvesting garlic. Here is our first installment: (our second installment about Harvesting and Curing can be read here.)

The fall weather of early to mid October (the same time as you would plant daffodil or tulip bulbs to over-winter) is a good time to plant garlic in most of the country. (In very mild climates, it can be planted clear through November.) You want to get the garlic plants actively growing before the days get too short and weather turns cold, so plants will over-winter successfully and produce big fat bulbs in early summer.

Garlic varieties ready for planting.

The first step is to prep the beds. We chose a garden bed in full sun and amended with lots of well-aged compost, and worked in a high nitrogen, granular organic fertilizer. We are using Down To Earth brand “Bio-Fish” fertilizer which has a high nitrogen content to grow hefty garlic bulbs, but there are lots of good organic brands of fertilizer choices nowadays available at garden centers; availability varies from region to region. Dr. Earth and MaxSea are two other good brands.

Organic Fertilizer & well-aged compost.            Spread compost evenly over bed & mix in.          Add organic fertilizer evenly & mix in.


Garlic bulbs need to be separated into individual cloves for planting. Each clove is planted 6 inches apart and 1½ inches deep with its tip pointing up and the root end down. Garlic planted in fall will establish vigorous roots before the weather turns cold and days get very short, then plants will grow vigorously throughout spring while each clove grows into a full head underground.

Separate bulb into individual cloves.   Plant cloves with tip pointing up & root end down.   Space cloves 6 in. apart & plant 1½ in. deep.   


Mulch bed with 4-5 in. of straw.
After planting the cloves, we are careful to add a thick straw mulch to the planting bed. Garlic tops will sprout up easily through the open texture of the straw.

Mulching the garlic bed keeps soil moisture consistent while fall weather is still warm after planting, and performs the critical task of protecting the garlic bed from erosion and nutrient leaching during the winter weather. In cold winter climates, where the ground freezes hard, the heavy mulch will also protect plants from frost heaving.


As the garlic plants grow and mature, look for several blog posts on taking care of them and on harvesting and curing and enjoying big heads of plump garlic cloves.

Thursday, October 3, 2013

September Recipe: Roasted Garlic Mashed Potatoes

Silky smooth and richly satisfying—everyone loves this dish! Roasting brings out the sweetness and nuttiness of the garlic to give more dimension to the mashed potatoes. It's even better with garlic you've grown yourself; check out our ready-to-plant varieties available now.

2 whole heads garlic
1 tablespoon olive oil
4 Yellow Finn or other yellow potatoes, peeled, cut in 1/2-inch cubes
1 tablespoon butter
1/2 to 3/4 cup hot milk
salt and pepper

GARNISH
2 tablespoons chopped Italian parsley, 1 tablespoon chopped chives


Preheat oven to 350˚F.

Slice tops off of the garlic, toss with the olive oil, then put the heads, tip-side up, in a small baking dish and cover loosely with foil. Bake for 25 to 30 minutes or until garlic is soft and tender. While garlic is roasting, boil or steam potatoes until tender. Drain well. Cool the garlic and squeeze out pulp. Mash pulp with a fork until puréed.

Mash the hot potatoes while mixing in the butter. Beat in the hot milk gradually, mixing until soft and smooth. Stir in the roasted garlic purée. Add salt and pepper to taste. Transfer to a warm serving dish, and garnish the dish with parsley and chives. Serve immediately.

Serves 4
For more great recipes check out
 Renee's Cookbooks:


Monday, September 9, 2013

Seed of the Month: Renee's Organic Stirfry Blend

This and many other veggie, herb and
flower seeds are still on sale!
Renee's Garden Year End Sale
Order while supplies last


Exclusive - Our fast-growing leafy blend to give you all the colors, flavors and shapes needed for perfectly balanced quick and easy stirfries. Includes: mizuna, mispoona, mild mustards and Russian kale.


Wednesday, August 28, 2013

August Recipe: Green Beans in Basil-Walnut Vinaigrette

For a lovely presentation put 1 or 2 radicchio or red cabbage leaves on each salad plate and mound the green beans on top. Visit our online catalog to see all the varieties of green beans we carry.

1 1/2 lb. young green beans, trimmed

Vinaigrette:
1 tsp. chopped garlic
20 basil leaves
1/2 tsp. salt
1/2 tsp. freshly ground pepper
2 tsp. Dijon mustard
4 T. white wine vinegar
1/2 cup extra virgin olive oil

Garnish:
Chopped walnuts
3 scallions thinly sliced


Bring a large pot of salted water to a rolling boil, add green beans and cook until just tender-crisp, 3 to 5 minutes. Drain immediately into a colander and pour ice water over beans to stop the cooking action. Drain well.

In a blender or food processor put the garlic, basil, salt and ground pepper. Pulse on and off, then add the mustard and vinegar. Pulse until smooth. Add the oil very slowly in a thin stream with the machine running, just until blended.

Place the beans in a serving bowl and pour the vinaigrette over them. Toss to coat thoroughly. Garnish with the scallions and walnuts.

Serves 6 to 8.
For more great recipes check out
 Renee's Cookbooks:


Thursday, August 15, 2013

Visiting Breeder Field Trials


 by Helen Clary,
Inside Sales Support


Hi there! I’m Helen Clary, one of the newer sales team members at Renee’s Garden. I’ve known Renee for many years and we have enjoyed riding our horses together on many of our beautiful local trails. I have always had a passion for animals, plants and nature and have over the years created a very productive vegetable garden using "our" seeds along with information and advice from Renee herself!  The best part is that now I am part of this amazing, dedicated team of people.

Going down the Trail
Renee's Patches and Ruby; Helen's Missy and April
I’d like to take this opportunity to share a little insight into a most fascinating trip to Sakata Seeds, a 100-year-old Japanese company that produces some of the seed varieties we offer in our line. Renee, Lindsay and I visited the Sakata Field Trials located at their Research Station in Salinas. We walked past huge greenhouses full of exquisitely colored flowers, and alongside fields of vegetables and herbs that seemed to go as far as the eye could see. As we arrived at the rendezvous point, we were met by Tracy Lee who co-leads the Home Gardening department for Sakata Seeds and has known Renee for many years.

    Looking at Baby Leaf Trials      Tracy and Renee discuss Collards
Tracy totally understood what Renee conveyed to her regarding where she sees opportunities to expand the product range while continuing to provide high quality seed and interesting, great tasting varieties at an affordable price for home gardeners. She helped guide us through the trials, pointing out varieties she thinks we would be interested in growing in our trial gardens. We found many future possibilities that Sakata’s veteran breeders are still working on that we hope to trial going forward.

Left to Right: Exciting new Chard colors we will trial; Looking through the
greenhouse window; Fascinating new Cosmos shape to trial
We tasted multiple varieties of spinach, baby greens and beets and Asian greens to name a few.  Lindsay laughed when I said "this tastes a bit like Arugula," pointing out that it was Arugula!  My plant education is expanding rapidly! I couldn’t believe how big some of the cabbages and cauliflowers were and how amazing the colors were for some of the chard varieties.
Renee and Lindsay in the Cauliflower Trial        Supper for Twelve                    
Renee in the Cabbage trial          Cabbage candidates to trial
I now have a better appreciation for the lengths that our company goes to ensure quality and variety. We came away with a number of potential new seed varieties which will undergo our rigorous home-trialing before they ever make it to the status of a "New Variety" for Renee’s Garden.

Renee gets some Flower Power!

Wednesday, August 14, 2013

July Recipe: Ten Minute Zucchini Pizza

A surefire way for kids (of all ages) to enjoy zucchini. Visit our online catalog to see all the varieties of zucchini we carry.

6 medium zucchini
Extra virgin olive oil
3/4 cup pizza sauce
(homemade or store bought)
1/2 cup finely chopped basil
1 3/4 cup freshly grated mozzarella cheese
1/2 cup freshly grated Parmesan cheese


Preheat oven to 425 F

Cut zucchini lengthwise into long 1/4 inch thick slices. Pat dry and brush both sides with olive oil. Arrange side by side on an aluminum foil lined baking sheet or pizza pan. Bake 7 minutes or until just tender when pierced with a fork. Top generously with well-seasoned pizza sauce. Sprinkle with chopped fresh basil, freshly grated mozzarella and Parmesan cheese and put back into the oven for 2 to 3 minutes until the sauce is hot and the bubbly and the cheese is melted. Serve immediately.

Serves 6
For more great recipes check out
 Renee's Cookbooks:

Tuesday, August 6, 2013

Seed of the Month: 30% Off 'Sun Samba' Sunflower

Still time to plant! Order today
and
get 30% off Sun Samba
by entering code "sunsamba"
at checkout  (Good thru 8/31/13)


This scintillating color blend is a dancing celebration of all the forms and joyous colors sunflowers offer. You’ll have strong branching stalks with free flowering big blooms in a full array of colors, including sunny yellow, deep gold, lemon, mahogany, bronze and golden orange with many variations. Sun Samba provides endless, strikingly beautiful bouquets and a glorious display that turns heads in the garden.


Thursday, July 18, 2013

Creating a Butterfly Garden

It is easy and fun to attract butterflies, the “flowers of the air” to your garden. Planning especially for these beautiful, ephemeral creatures enables you to see their intricate wing patterns up close as well as play an active role in the important work of pollinator conservation. In home gardens, the presence of butterflies flitting and frolicking in carefree flight indicates a healthy and well-integrated habitat.

Butterflies seek flower nectar for nourishment and fuel for flying. With each sip from the heart of a flower blossom, grains of pollen also gather on the butterfly’s body, and it then helps pollinate the garden as it flutters from blossom to blossom. Flowers advertise their unique personal attributes of color, scent, and shape to lure butterflies to land upon them, thus ensuring the spreading of their seeds.

A successfully designed habitat that sustains butterflies includes food, shelter, water and warmth.

Since butterflies are attracted to both flower colors and shapes, plan large groups of plants that provide big splashes of brilliant color to draw them, instead of isolating a single flower plant here and there throughout the garden. Sunny days in the garden are synonymous with a busy freeway of flying butterflies. The hot sun warms their wing muscles, enabling them to soar and fly while going about their job of pollinating, so situate the butterfly garden in the warmest, sunniest area.

On gusty summer days, they need protection from the wind, which is easily provided by arranging tall flowering plants at the back of the border to make it comfortable for the butterflies while they are “nectaring.”

As children are attracted to puddles of water, so are butterflies. A shallow water element in the form of a bird bath, decorative stone water container, or small water garden situated in the ground will serve their needs and add interest to the garden.

Be sure to include a mix of different flowering plants. Here are a few of my favorites:

For the back of a border, the shiny, fern-like, coppery foliage of “SMOKEY” BRONZE FENNEL with its golden umbrella-like flowers is a stunning backdrop for lower growing plants. A long dramatic row of “TORCH” TITHONIA planted at the back of the border makes a blazing hedge of brilliant orange-red landing pad blossoms, and provides both a convenient perch and windscreen for winged visitors. “CINNAMON SUN” or CHOCOLATE CHERRY” SUNFLOWERS glow in deep and deeper red colors and “SUN SAMBA” dances in a full range of bright colors: from cream yellow and deep gold to bicolors in shades of bronze and mahogany over gold.

For the mid-border, air-waltzing butterflies will be attracted to the searing scarlet and orange colors of “PERSIAN CARPET” or “LITTLE LION” ZINNIAS. Charming semi-dwarf “MUSIC BOX” SUNFLOWER offers a range of pretty, golden yellow shades and bicolors that add visual interest or choose “LITTLE LADYBIRDS” or “WHITE SEASHELLS” COSMOS. “BERGAMO” MONARDA is another midrange butterfly magnet.

Line the front of the border with fluffy apricot pillows of “SUMMER PEACHES” ALYSSUM, or “SUMMER SPLASH” or “SIGNET STARFIRE” MARIGOLDS to create a welcoming effect. Or, plant FRENCH or CREEPING THYME, MARJORAM or OREGANO, as the blossoms of these perennial herbs also attract butterflies big-time.

All of these flower selections are excellent choices not only for butterflies, but for gardeners as well as they are beautiful and long blooming garden flowers through the season.


Browse our complete list of Renee’s Garden Butterfly Flowers and Herbs, or choose our Seeds For A Butterfly Garden Bonus Pack, which includes 3 individual packets of easy to grow heirloom butterfly flower varieties to bring butterflies all summer long. It includes complete planting and growing instructions and garden design information.


Thursday, July 11, 2013

Seed of the Month: Smokey Bronze Fennel

Striking Bronze Fennel has 4 to 5 foot plumes of filigreed coppery leaves and lacy golden flower
umbels that ripen mellow anise-flavored seeds. These plants are stunning additions to herb or
flower beds and are major nectar hosts for many butterfly species (especially swallowtails).

Season seafood, salads or cooked vegetables with sprigs of the feathery copper-bronze leaves.
Tea made from the aromatic leaves or sweet seeds soothes upset stomachs and calms the nerves.


Related Posts Plugin for WordPress, Blogger...